Community Favorites

Showing posts with label plaid. Show all posts

Sunday, September 17, 2017

You Friend, are a HOOT!

Good morning & welcome to another fun week at the Hi Notes blog!!Remember that sample of plaid paper I was teasing you with?  Well, here it is!! There is also a second plaid project hiding in this post, can you see it??
Caption: "Chiller" font before printing
They are generously donating the prize  to one lucky crafter!


I have to admit I did have another digi from them that I planned to use this week, but I got 80% into my project & realized I would need more water color paper!  No big deal! Right?  Not when you live between mountain ranges in the middle of no where!!  So I had to put on the brakes and think up a new project.  It was painful for me to give up on the autumn card I was so excited about!!  My plan was to use these owls in a Halloween post, but I love this digital so much that I was able to think up something fun in a jiffy!! So be watching for a completed water color Autumn card with more Bugaboo Images!!!


do you see the second plaid project? :)
Inspired by Tatiana Craft & Art with her non-traditional leaf colors I decided to make one of the cards with pinks, blues & purples!!  Thanks Tatiana!!  I really love those cards :) 


I printed off a few of these owls because I wanted to be prepared with back ups!!!  I do this a lot since once I cut my full size sheet I can not run it throught the printer again, this way I utilize the paper better, esp if I need to print off a second digi!!


I thought it would be fun to lay the cards flat so you could see the backs & how they were constructed.  I think I will add a stitched edge to the back flaps. 
  
Here are the insides :) CLICK photos to view them larger

REMEMBER, LINKS ARE IN BOLD SO CLICK AWAY ;)

Wednesday, September 13, 2017

Time for Plaid Madness!

Well, hello again.  Thought I would do a quick and fun teaser post.  I don't know what it is about plaids but I can't get enough!!  I really enjoy creating them too!  For more on how to made your own click ~ HERE


I keep my eyes open for linear stamps just for making or accenting plaids!  This set from Deep Red called Grunge Borders & comes as one rubber sheet.  They are very close to each other so I was afraid scissors might not cut as straight & smoothly as required.  Solution, Exacto knife, straight edge and a cutting mat :) I had to score the line several times until I had cut through all of the layers, but it was easy and wow!!  Look at those straight lines :)

Friday, October 28, 2016

Creating Custom Plaid Papers


Have you noticed with the onset of Fall all the new plaid papers that are coming out?  I am one of those people that is crazy about plaids. I just LOVE them!! Unfortunately I rarely am able to find papers that are not only the colors I want but also the pattern of plaid I like! 

If you truly love stamping (like I do!!) this might be the time to start making your own plaid papers.  The following is a picture tutorial on creating your own  designs. Click on the pictures to enlarge them & make reading the notes on them easier.

Also, unless you plan to make your lines with a ruler, or free hand, you'll want a "plaid builder" stamp set. I'm sure there are many out there.  Here's one of the sets carried by Papertrey Ink   https://www.papertreyink.com/stamps/plaid-builder-stamp-set/


The stamp set I am using is Retired (Long ago!) by Stampin' Up!


To make your lines evenly apart make incremental marks at the top, bottom & sides of your paper and line up with the stamp lines on the imaging sheet. Once your first lines are in they become your guide to the next stamping lines.  If you need to extend the size beyond the size of your stamps the best way to keep there from being a line across your finished work is to stagger up & down your original lines so that the stamped connection is scattered through your piece.


I extended the length of the stamps above as an after thought. You can see how I ended all of the edges in the same line.  Although careful as I stamped the line becomes more apparent. Staggering where the end of the stamp falls would eliminate this linear distraction


If you aren't sure how far apart or what colors or line patterns to use making your plaid, find one you like. . . . in a book, on line, maybe your favorite blanket or shirt.  Have it nearby and stamp the elements from that as you go.  It's limitless how many ways & colors you can stamp them!  It is also a good idea to identify & use the colors in your favorite papers.  Then they are always sure to match!

Thursday, October 27, 2016

Feline Fun

Here's a fun kitty stamp from Unity Stamp Company "Meow Meow Meow"

I just love the sweet little glasses.  I think it says a lot about this little cat's perr-sonality!! 
UK-926A-MEOW-MEOW-MEOW
https://www.unitystampco.com/shop/meow-meow-meow


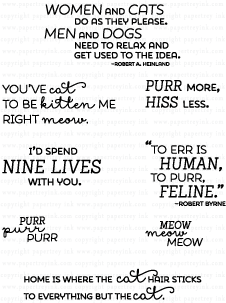
Everyday Cat Sentiments Mini Stamp Set
https://www.papertreyink.com/stamps/everyday-cat-sentiments-mini-stamp-set/  
The whole set of feline saying is only $5 !!  I think they are all such fun!


                        The sentiment I used is
                          from Papertrey Ink.
                    Click the pictures to enlarge


Inside I used 4 different stamps to get the sentiment I wanted!!!  The main body of the sentiment  was individually inked and stamped. I purposely left off the "Autumn" portion of it which is positioned at the top of the stamp.  I used a stamp positioner to place the words (each from a different stamp!!) "have" & "a".  Then I lined up the "PURR-FECT" part of the sentiment in the Unity set, selectively coloring & stamping it.  THEN (whew!) I stamped the word "Autumn" at the very bottom of the sentiment!

Luckily it all lined up & I really like the results.  I wanted an Autumn just because (or maybe "Just Be-claws") card & I really wanted to use my new cat stamp, so this made it all tie together for me!


For fun I usually try to finish the back and inside of all my cards.  This one was so quick & simple and I love the way it makes it feel that much more special to the recipient.


Luckily, I already had some die cut leaves on hand because last night the bearings went out in my Big Shot.  :(  Absolute awfulness!  To make the things I normally used the Big Shot for: I drew in the stitching around the large background and traced one of my dies & cut it out by hand for the plaid cameo.  Not having access to my dies also encouraged me to check out my punches. Making the leafy vine was super fast with my Martha Stewart border punch!
I'll have to remember to look at them more often!!


Tomorrow I hope to blog how to make your own plaid backgrounds like the one I used as a cameo behind our cute little cat.


In case you've missed it I shared an easy way to color the die cut leaves and a super simple way to pop them up without a lot of fuss.  I've been having a lot of fun using them out of my stash for the last couple of weeks!! See blogs from October 2016 "Water Color Leaves" & "Making Small Die Cuts Pop-Up"